I have a Westerd Digital network (WDmycloud) drive which I try to mount in Zorin and I cannot.
I have put the user name and password that I use to mount the same drive in another laptop that has Linux Mint and it simply does not work in Zorin. The default domain when trying logging in is "WORKGROUP" which I leave untouched and I add my user name and password and click connect.
My machine is a Lenovo Legion Y250.
Can anyone advise please?
Hi, and welcome to Zorin OS.
Are you trying to mount that drive to a specific location, or just access it through the file explorer? If it's the latter, you can do so via "Other Locations", and entering the details of the network share. Otherwise, you need to jump through an extra hoop or two.
If there are any error messages, please share a screenshot to see if they have some useful information about what's wrong.
1 Like
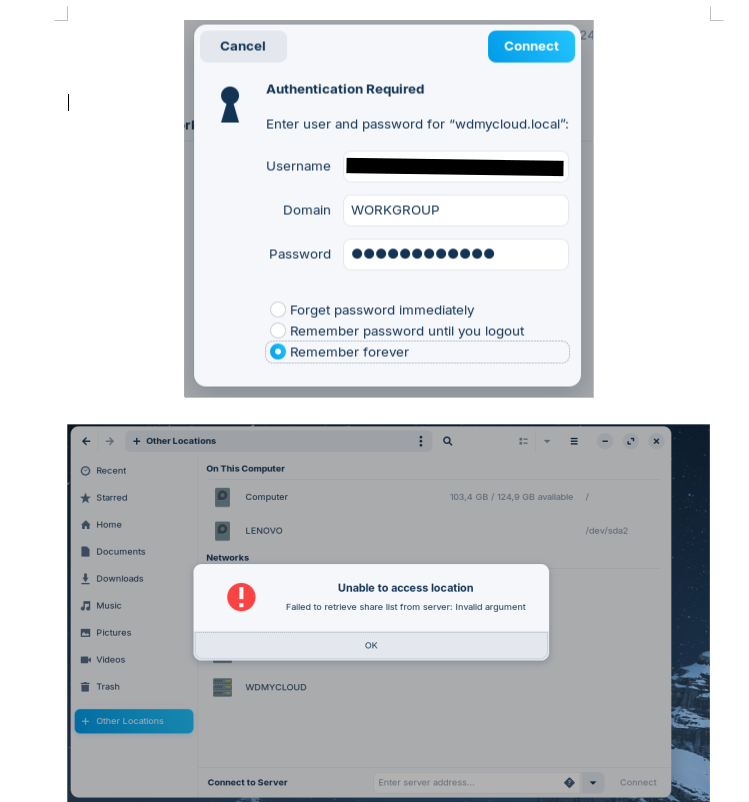
I am trying to connect via file explorer. I left the domain as shown in the below screen but I also tried putting in the domain field the WDMyCloud as suggested in the internet, the IP address, and also wdmycloud or wdmycloud.local and of course the user name and password that works in Mint.
Do you have access to your WDMyCloud through some dashboard? I suspect it might be using a different version of the SMB protocol to share files, than what the file explorer in Zorin OS uses.
In the meantime, here's how you can set this up manually. It requires running a few commands in the terminal, which you can find in the applications menu → Utilities → Terminal:
-
Create an empty folder in your desktop. I'd recommend avoiding spaces for the name — "mount_test" is a good example. We can change this later no problem, I just want to use something quick for now until we figure it out.
This is obviously something you can do with the mouse, but just for completeness you can this command to create it through the terminal:
mkdir -p /home/zenzen/Desktop/mount_testJust make sure to modify this command to match your actual username. I'm using my own here just for illustration purposes.
-
Install the necessary packages by running the following command:
sudo apt install cifs-utilsThis is necessary when going with the manual approach because the file explorer has its own internal implementation.
-
And now for the actual test. This command is a little longer:
sudo mount -t cifs //IP/directory /home/zenzen/Desktop/mount_test -o vers=1.0,username=admin,password=adminSince you know the IP address of your NAS I'd suggest using that, being as explicit as possible. Notice that you need to provide the directory the NAS is sharing, too. And if that location is has spaces in the name, add some quotes around it, for example:
sudo mount -t cifs "//192.168.122.110/PUBLIC DISK 1" /home/zenzen/Desktop/mount_test -o vers=1.0,username=admin,password=adminKeep an eye for that last part of the command, the options. There are no spaces between each option, just a comma. Obviously, make whatever adjustments you need to use your IP address, username, password for the NAS, etc.
Run this, and let's see if this works.
1 Like
Hi, by installing the cifs-utils it opened the same window like in Mint and accepted by credentials. Thank!
2 Likes
I found some time ago when people were having samba issues (which was actually written by Microsoft for Windows computers, not Linux) the missing link always tends to be 'cifs'! ![]()
This topic was automatically closed 90 days after the last reply. New replies are no longer allowed.