A lot of electronic ink has been spilled in various forums of how to connect to other PCs on our home network, especially between Windows and Zorin/Linux. Often, advice is given that assumes prior knowledge that Windows users just don't have (such as: "All you have to do is start it as a service.") without giving those steps clearly.
Here is my goal, and if you share it, read on to how I was successful (i.e. there are many ways to skin a cat; this is just my experience):
I have a Windows 11 PC in my office and want to connect to a Zorin PC in my living room.
- I want to access it as though I was sitting in front of it: same desktop, etc.
- I'd like to access it locally, rather than through the cloud like RealVNC, Teamviewer, etc.
- I want snappy response and easy use of the mouse
Here are the steps I followed. I chose to use Rustdesk.
More discussion below, such as Why Rustdesk? What else did you try?
First, something I learned along the way. Don't install Rustdesk using the Software Manager.
The Software Manager installs software in a sandbox. This means that it's difficult (beyond me, anyway) to start the program at startup (i.e. as a service) when installed by the Manger.
-
Download Rustdesk as a deb file
- Such as rustdesk-1.4.5-x86_64.deb
- Can be downloaded from Github repository
- Look carefully for the deb file you want. It's a long list (called assests)!
- It can be saved to your Downloads folder (notice that the capitalization is important in Zorin)
- DON'T double-click! That will invoke the Software Manager to install it. NOT desired.
-
Open the Terminal (without screaming or hair-pulling)
By the way, the sudo at the beginning runs the command as an administrator. Very important. -
Always do an update before installing:
sudo apt update -
Install a helping program called gdebi
- gdbi checks for required dependencies
- I tried installing without gdbi, and it was far easier with gdbi:
sudo apt install gdebi
-
Navigate to the folder where you downloaded the deb file
-
R-click on deb file
- select "Open with" or "Open with Other Application"
- select GDebi Package Installer
- select "Install Package"
- Allow GDebi to install necessary dependencies and Rustdesk
-
Set up Rustdesk for home network access
This is the same for both Windows and Zorina. Go to Settings
- 2 possible ways: 3-line hamburger icon at top R
- 3 dots by ID in L sidebar
- Notice it opens in a new tab called "Settings"
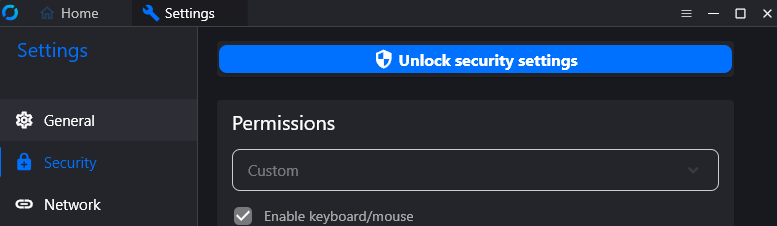
b. Select Security from L side
c. Click on "Unlock security settings" at top
The system will double-check you want to do this. Proceed.
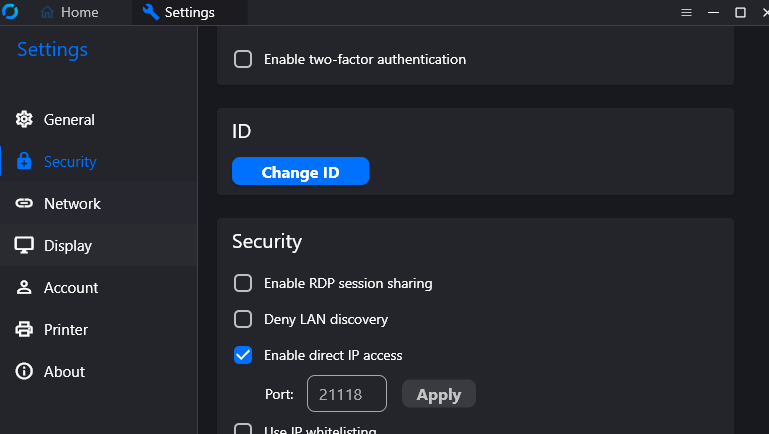
d. Scroll down to Security section to "Enable direct IP access"
- Click on checkbox
This enables you to access your other PCs without a server
You can use either the ID or the IP address of the other PC
-
WHILE YOU'RE in security settings:
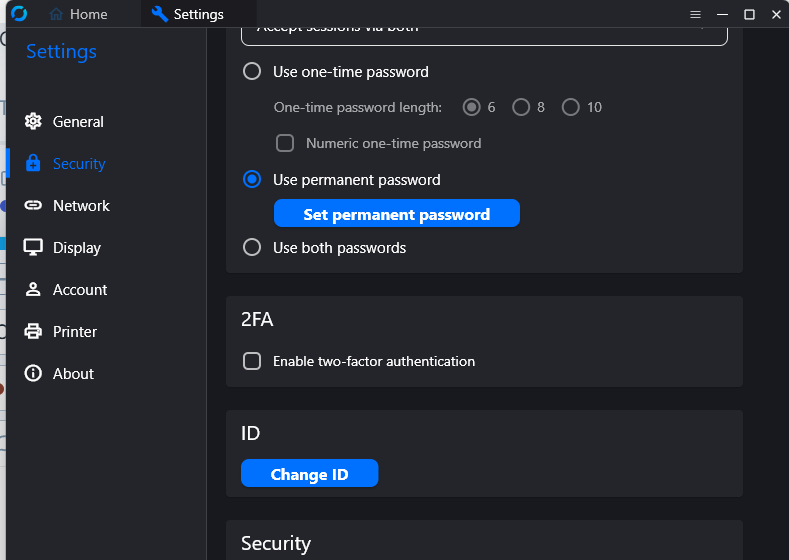
I set a permanent password for unattended access- Look for this option under Password in the Security section
(above the Security section ) - if you don't set it, the password changes each time
- make sure you check radio button to Use permanent password (not Use both...)
- Look for this option under Password in the Security section
-
To return to the Rustdesk main program, click on the Home tab at the top
- feel free to close the Settings tab
-
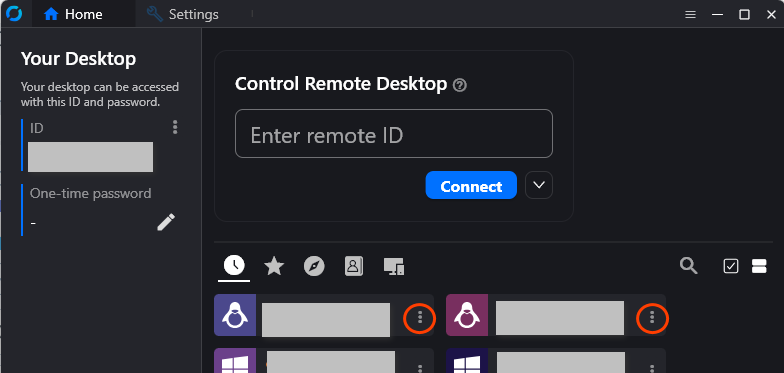
To see this work, you need two PCs set up.

- I love the fact that the program looks exactly the same across versions.
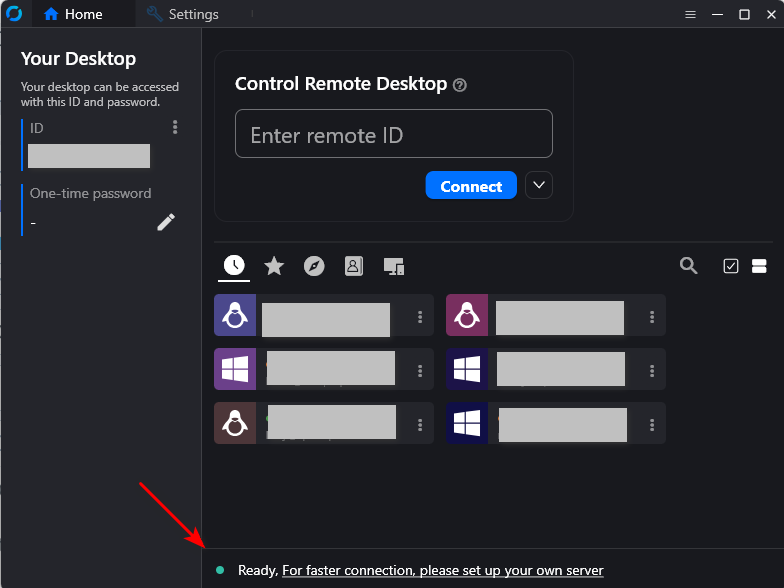
- On the left panel "Your Desktop" is the ID of the PC you're on.
- Find the ID of your other PC and type it in the box of "Control Remote Desktop"
OR use the IP address. Both work. I suspect the ID references the Rustdesk server in some way; the IP doesn't... I wonder. - The first time you click "Connect" it will ask for the password
- If you're like me, you'll tell it to remember the password
Hopefully, this means you'll see your other PC!
Other tips:
- For me, Zorin automatically started Rustdesk as a service so it started automatically
- On Windows, I clicked at the bottom of the main window where it offers to start Rustdesk as a service. Worked like a charm the first time. After you start the service, the line at the bottom encourages you to set up your own server.
- YOU DON'T NEED TO SET UP YOUR OWN SERVER if you "Enable direct IP access" as described
- Check out the icons on Rustdesk's main screen. The far left (a clock) shows "Recent Sessions"
- Click the 3 dot menu and add the connection to favorites if you want
- Click the 3 dot menu and add the connection to favorites if you want
Discussion. Well, really only one question here...
Why Rustdesk?
-
I struggled (in vain) to set up VNC on Zorin 18. That's what I used before; but I couldn't figure it out, in spite of the many many (did I say many?) discussions out there. I was able to share the desktop on Zorin 17 with VNC because it was built-in. For Zorin 18, they switched to RDP, which I couldn't get to work either.
-
I've used RealVNC (limited in number of PCs plus it involves an account and their server, even if I'm not leaving my home network).
-
TeamViewer: same thing. Plus I kept triggering their "too many users; are you sure you're not a business" warning system. Other VNCs also require accounts and going through their servers. I tried a few, but Rustdesk delivered!
I believe one of the keys was in installing Rustdesk from the terminal rather than with the Software Manager. But I like that I can set it up for local connections, not involving any server in the cloud. No account needed, either.
-
I also found a helpful discussion about using Tailscale with Rustdesk to be able to access my home network while traveling: Using tailscale & rustdesk Works brilliantly! And I could then rename my Connection in Rustdesk with a -tail at the end to show my two connections: one with tailscale; one without. (i.e. LR-pc and LR-tail)
-
Many tools: The menu at the top of the Rustdesk access (when you're accessing the other PC) is very versatile. The icon with the screen enabled me to select "Scale adaptive" so the remote screen fit my window. Or go Full Screen! It also enabled me to select which screen on a multiple-screen PC I wanted to view: 1, 2 or both. Wow. So helpful.
There are many other tools available there: transfer files, chat, record, restart remote device... Check it out!
There you have it. May you be successful, too!