Welcome to the Forum!
Did You checked the Checksum of the downloaded ISO?
Are you want to install Zorin beneath another OS (Dual-Boot)?
Are Secure Boot and Fast Boot in the BIOS disabled?
Is the Drive a new One or already in Usage?
- yes , I want to dual boot zorin OS side by side with Window 11.
- Yes, Both of the secure and Fast boot are enabled. ( Checked twice )
- No, the drive is not a new one , it is a HDD ( SATA - RAID ) in which window 11 is already installed.
1 . What do you mean by checksum ?
-
You will need to disable secure boot and fast boot.
-
You need to change the setting from RAID to AHCI.
Checksum: All .iso's have a checksum to verify that your download is not corrupted. Download Accelerator Managers can corrupt an iso. Refer to this Zorin OS help page:
3 - Both of the secure and fast boot are disabled.
4 - Changed from RAID to AHCI. ( with safe mode enabled )
Checksum - Both hash value are same , the one I got from QUICKHASH and
the one stated on the website .
*EVEN AFTER DOING ALL THIS IT SHOWS THE SAME , IT ONLY DETECTS MY PEN DRIVE..NOT THE HDD .
Does your Windows 11 install have the dreaded August 2024 update?
Is Your BIOS in UEFI or Legacy Mode?
What Tool did you use to create the bootable USB Stick?
Because you are using Windows there would be Rufus a good Choice. It has a Point where You can choose which Partition Sheme you want to use for the USB Stick: GPT or MBR. When You have a UEFI BIOS, GPT would be the better Choice. When Your BIOS is in Legacy Mode MBR would be better.
And another Point: did You disabled Fast Start-Up in Windows?
Plus if on one drive you will need to shrink C:\ drive first to make room for Zorin using Disk Management in Windows.
When you use the Option ''Install Zorin alongside Windows'' You don't need to do that. When You choose this Option, you get a Toggle which you can move to left and right to set up the space for Zorin. I used it in the Past every Time and it worked without Problems for me.
- My PC BIOS is in UEFI Mode.
- Yes, I have used Rufus only ( chose GPT as an option while making it a
bootable pendrive ) - Yes Fast start UP is disabled.

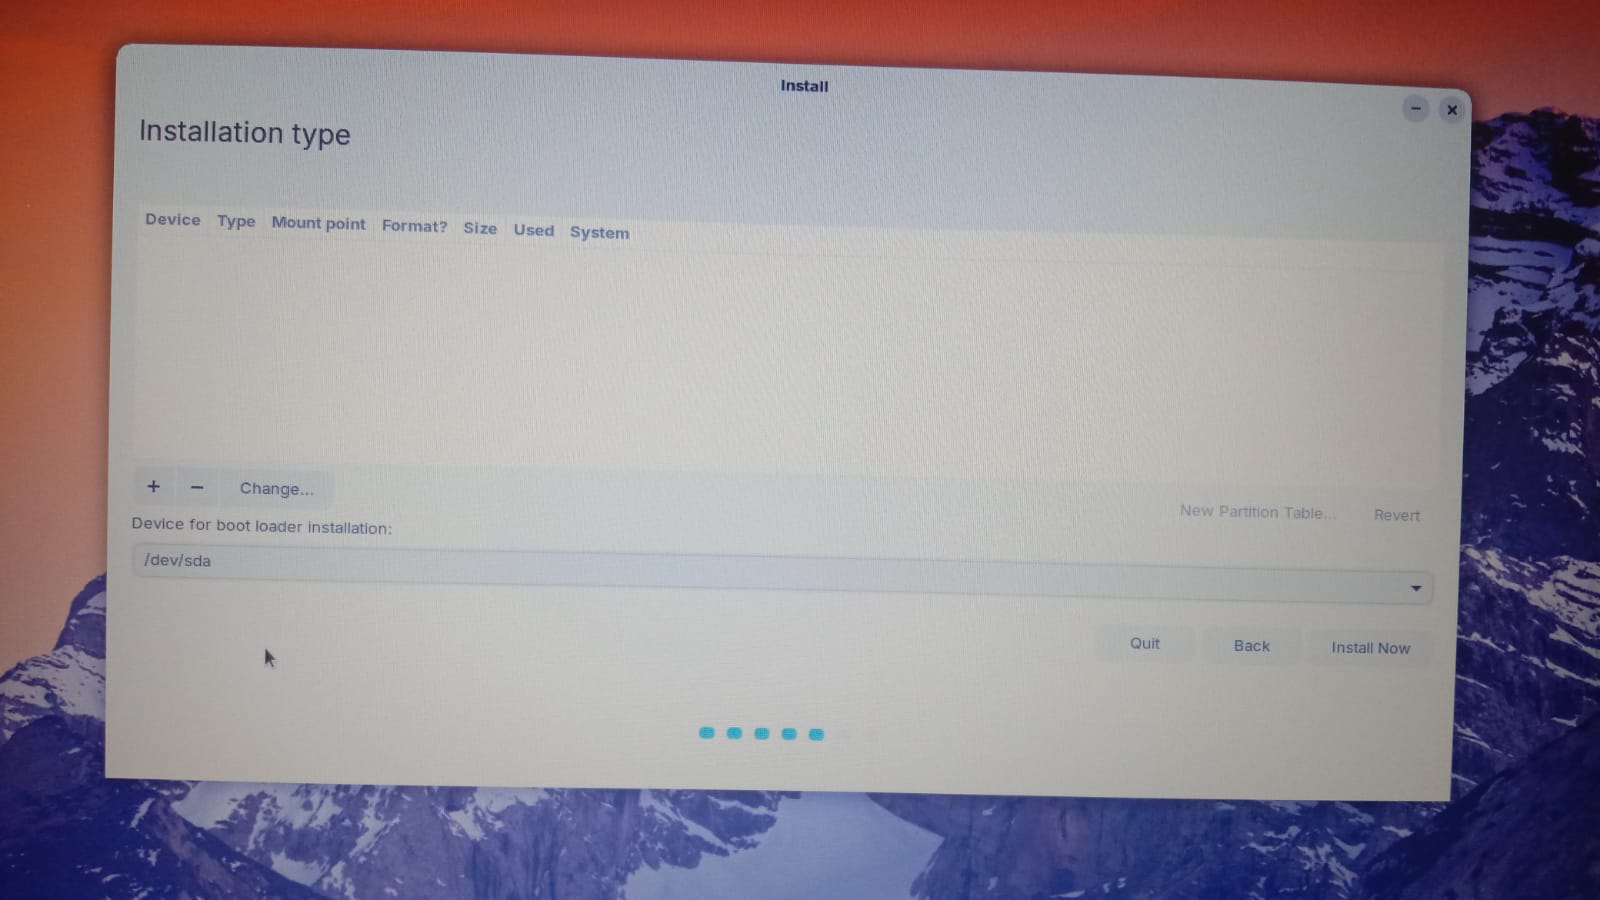
The option which your telling doesnt shows to me while installing. In many tutorial it is there but for me it isnt. ![]()
You can see in this that step is not showing . ( sorry for the quality )
Yes , But while installation it does not even show my hard drive .
No , I checked my update history and it is not listed there . So I think that it is not installed.
- IF IS THERE ANY OTHER WAY TO CHECK IT PLEASE TELL .
Are you installing to a Desktop or Notebook? I'm sure I read somewhere that some branded computers prevent install of GNU/Linux so would be useful to know make and model and specifications of your computer.
Doing some searching I found this:
"HDD Not Detected with Rufus
Based on the provided search results, here’s a step-by-step guide to troubleshoot the issue:
- Check Rufus log: Run Rufus with USB Debug enabled (Alt+.). This will provide a detailed log of the process. If you’re getting an “0 devices found” message, it might indicate a hardware issue with your USB port or the pen drive itself.
- Verify pen drive compatibility: Ensure your pen drive is compatible with Linux. If it’s an exFAT-formatted drive, you may need to install the
exfat-fusepackage (e.g.,sudo apt install exfat-fuse) to access its contents. - Check USB port and autosuspend: Reboot your computer and check if the pen drive works in a different USB port. If it does, autosuspend might be the issue. Edit the grub file to disable autosuspend (e.g.,
sudo grub-mkconfig -o /boot/grub/grub.cfgand look forusbcore.autosuspend=2, then change it to0). - Use
dmesgorusb-devicescommands: Rundmesgorusb-devicescommands to check if your system recognizes the pen drive. If it’s not listed, the issue might be with the USB port or the device itself. - Try a different installation method: Instead of using Rufus, try creating a bootable USB drive using the
Startup Disk Creatortool (available in Ubuntu) or by burning the Ubuntu ISO to a CD/DVD and booting from it. - Check HDD compatibility: If your HDD is not showing up, ensure it’s compatible with Ubuntu 22.04. You can try connecting it to a different system running Ubuntu to rule out hardware issues.
- Partitioning and formatting: If your HDD is not showing up, it’s possible that it’s not properly partitioned or formatted. Use a tool like GParted (available in Ubuntu) to check and adjust the partition table, or reformat the HDD using a compatible file system (e.g., ext4).
Remember to backup your data before attempting any modifications to your HDD or pen drive."
Hmm ... when you go in Your BIOS: ist there Your Harddrive listed?
I can imagine it is because the Installer can't detect the Windows Boot Loader because it can't detect the Drive correctly.
Yes , In the BIOS the HDD is listed correctly .
I am installing the OS in a Laptop (Acer Extensa EX215-52) . Should I try installing lite version of zorin OS ...
When you are in Zorin live environemnt, does the HDD appear inside Disk utility app?
If not, then share a screenshot of your HDD from your Windows 11.
-
In the zorin live environment , the HDD is not showing in the utility .
[ ONLY PENDRIVE IS LISTING ] -
Screen shot of HDD


Looking at your Windows screenshot your disk has no free space. You will need to use Disk Manager in Windows to shrink C:\ drive to make room for Zorin. Windows 11 now uses GPT partitioning so:
" Install Ubuntu 22.04 as GPT
Based on the provided search results, here’s a step-by-step guide to ensure a successful installation of Ubuntu 22.04 as GPT:
- Create a bootable USB drive: Download the Ubuntu 22.04 ISO file and create a bootable USB drive using Rufus (for Windows) or Etcher (for macOS/Linux). Make sure to select the GPT partition scheme during the creation process.
- Set your BIOS/UEFI to UEFI mode: Enter your system’s BIOS/UEFI settings and ensure that the boot mode is set to UEFI. Save the changes and exit the settings.
- Prepare the installation media: Insert the bootable USB drive and restart your system. Boot from the USB drive by selecting it in the boot menu (if available) or by setting the USB drive as the first boot device in your BIOS/UEFI settings.
- Start the installation: Once booted, follow the installation wizard’s prompts to select your language, keyboard layout, and other preferences. When asked to partition your disk, select the “Something else” option.
- Create a GPT partition table: In the partitioning menu, select the disk you want to install Ubuntu on and click “New Partition Table”. Choose the GPT partition scheme and create the necessary partitions (e.g., EFI system partition, root partition, and swap partition).
- Format the EFI partition: Create a small EFI system partition (around 100-250 MB) and format it as FAT32. This partition will contain the UEFI bootloader.
- Install Ubuntu: Complete the installation by selecting the GPT partition scheme and installing Ubuntu on the designated partitions.
- Verify the installation: After installation, restart your system and ensure that it boots correctly into Ubuntu.
Additional notes:
- If you’re dual-booting with Windows 10, make sure Windows is installed in UEFI mode (GPT partition scheme) and your BIOS/UEFI is set to UEFI mode. This ensures compatibility between the two operating systems.
- If your system only supports legacy BIOS mode (MBR partition scheme), you may need to use a workaround, such as creating a hybrid MBR/GPT partition table or using a third-party tool to convert your disk to GPT.
- The Ubuntu installation media has both boot methods (UEFI and legacy BIOS), so your system may automatically detect and use the UEFI boot method if available."