I noticed in your last screenshot you have snap installed, so it might depend on which Browser you have installed and how it was packaged. First place to check is your /home folder. These are usually hidden files. To do this in the terminal you need to follow this answer:
Your bookmarks should be in your profile which usually has 'default' in the file name.
@imakeyper FYI. I just edited the screenshot in post #34 to rotate it 90deg to aid reading without laying down. I left the original screenshot there as well. Zab
I went back over the info you gave me and thought I'd try the commands again at the very beginning of this thread, in particular the sudo journalctl --vacuum-size=200M.
I got better results in that I got the home screen back. Before when I tried the recovery it did not have these results. Why, who knows; typo, other commands I had done fixed this. I wish I knew.
So right now I'm at my home screen and I have the "Low disk space on filesystem root" message there again. It says I have 300.6 MB disk space remaining. It also asks me if I want to ignore or examine.
So I thought I'd try the 4 commands you had given me to clear out space; sudo rm-rf/var/crash/*, etc. These are found under the answer you gave me that starts with "Ok what happens when you run".
The command sudo rm-rf/var/crash/*, put in with a space between rm and -rf and without a space, and it came back saying 'command not found".
Can you help step me through what I can do at this point?
I did this and restarted my computer. I saw there were updates to be done and I ran the sudo apt clean && sudo apt autoremove command before installing the updates.
When I went back to the home screen the low disk space message is there again. This time is says I have 0 bytes disk space remaining.
I just saw a red circle with an exclamation mark on the tray at the bottom. I clicked on it and it says: An error occurred, please run Package Manager from the right-click menu or apt-get in a terminal to see what is wrong. The error message was: 'Error : Opening the cache (E:Write error-write (28: No space left on device), E: The package lists or status file could not be parsed or opened.)'. This usually means that your installed packages have unmet dependencies. It gives me the option to show updates, install all updates, check for updates, start package manager.
The app menu is the search on the left bottom by the zorin logo right?
Well I tried putting those words into that area and nothing happened. In fact it took me off that page and back to the sign in page which did not show it booting into zorin again.
I read about partitioning when I installed zorin but it never came up and I was thinking because I don't have windows or any other system on my computer.
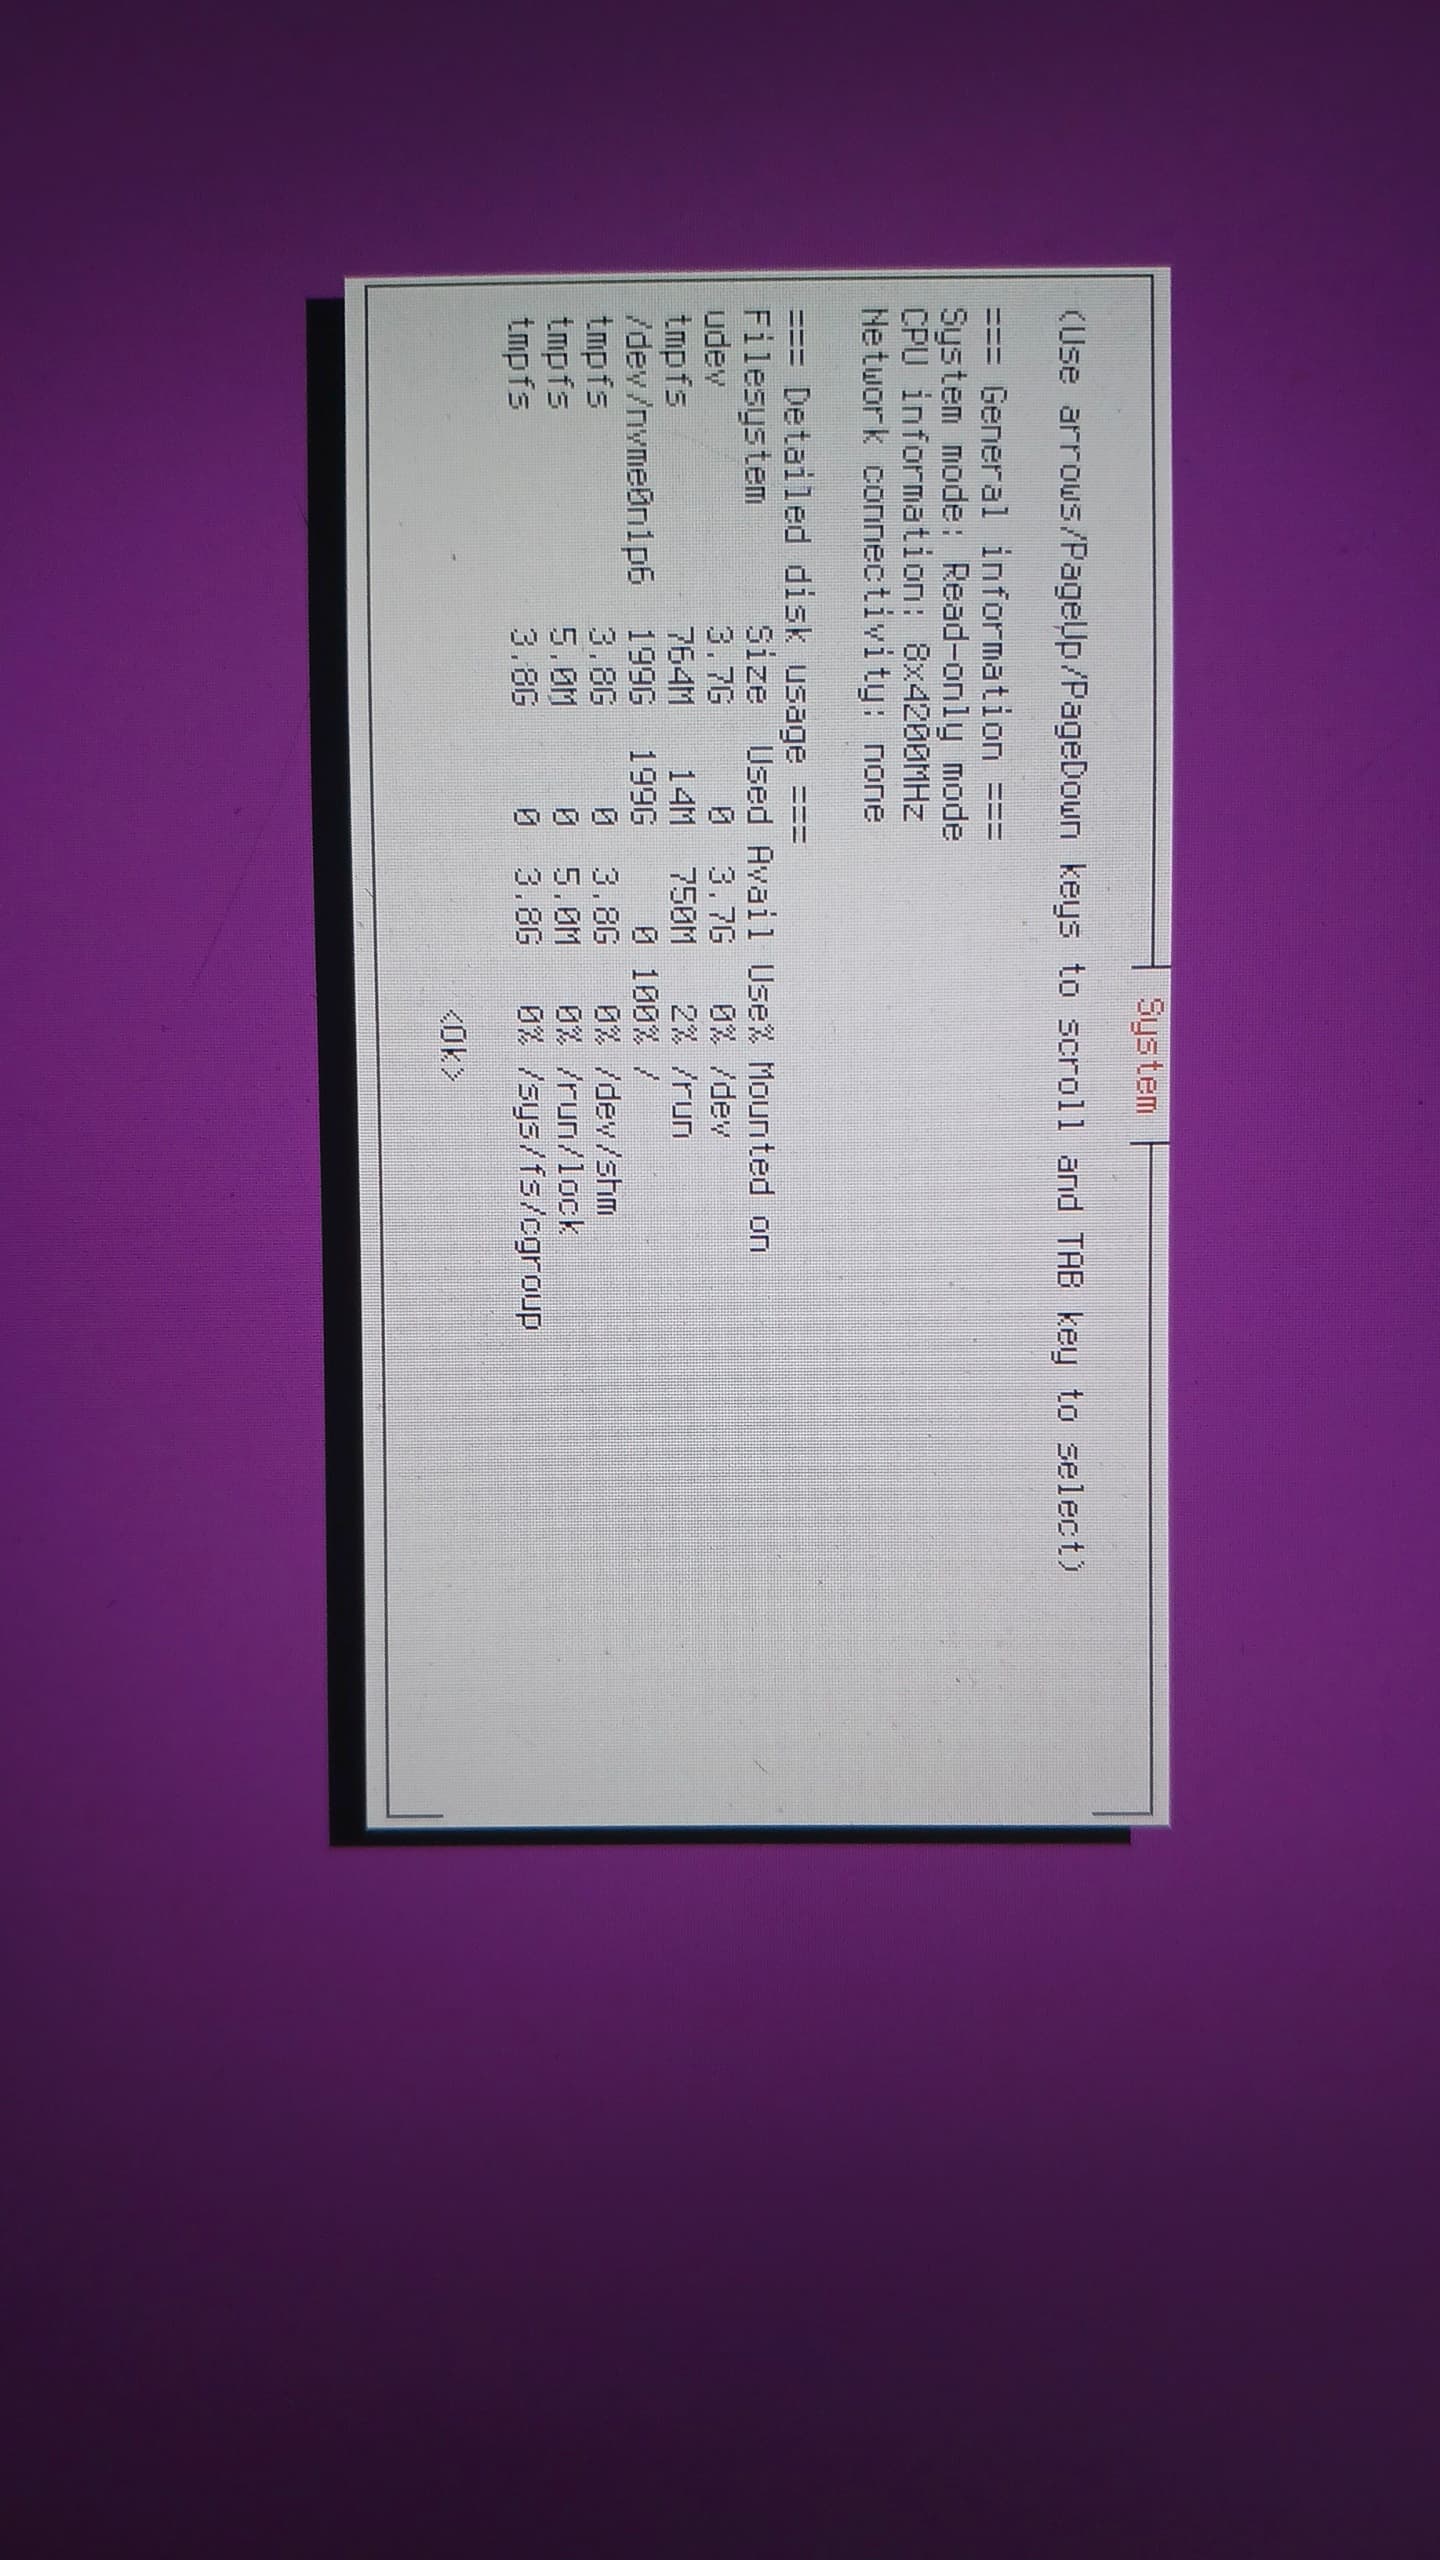
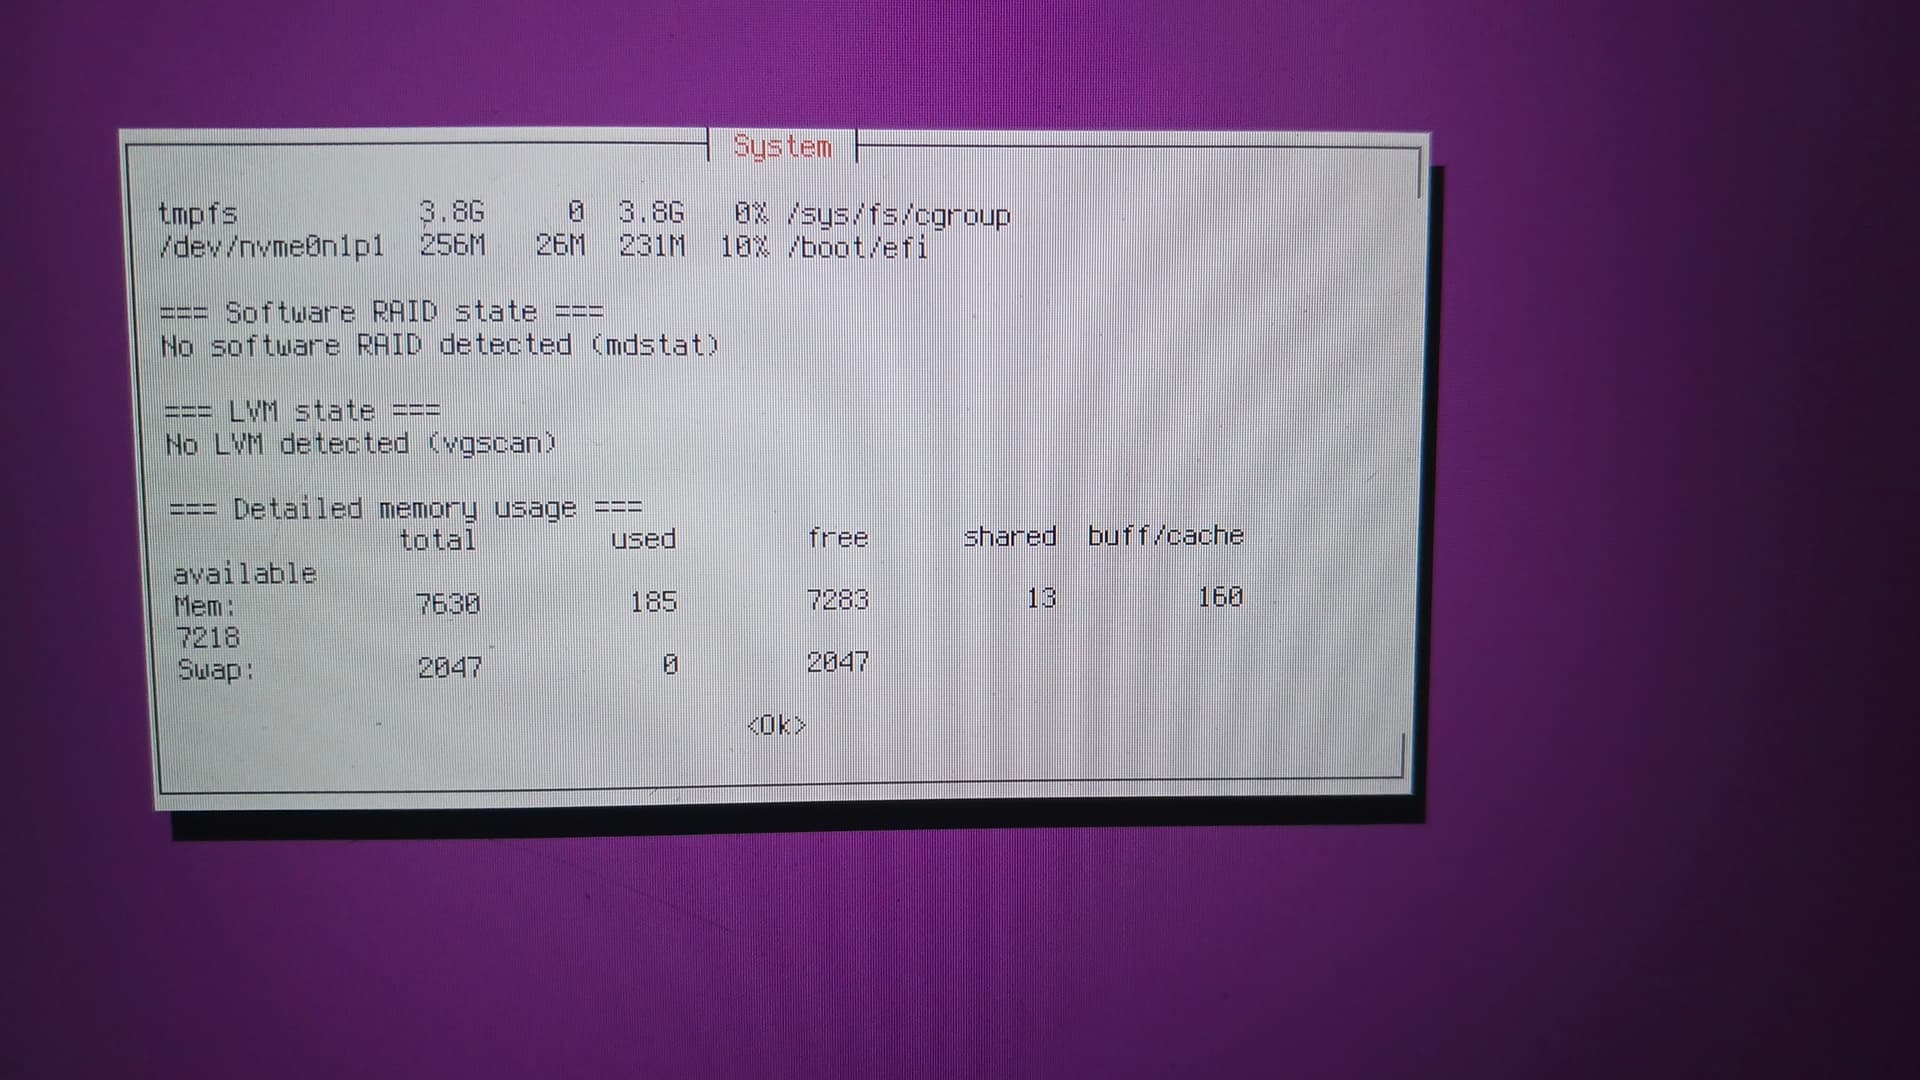
I found system summary as an option under the grub BIOS and it shows file systems with their size, how much is used, etc. Would this info help you?
I think I remember you mentioning something about changed parameters. I was told to choose the first entry and then press E.
I have been looking everywhere for help to get my computer back and I saw a place that showed the actual screen I should be doing this from. It is totally different than the one I used. I'm supposed to choose Zorin and then hit E. I went into the recovery and chose the first option (There were 4) and hit E.
Were you the one that said something changing the parameters?
I'm going to follow that info showed and see what it does.
I have in the context of other issues - I am not sure what you are addressing at this time that needs a grub parameter... it would not affect a filled root space.
I've been trying to get somewhere with this problem by reading and searching...... I get caught up with all the details and it confuses me when it doesn't necessarily apply to me.
When I first asked questions I got some things wrong like where I should go to choose the first entry and press E so some of the outcomes were wrong that I gave you.
Would you be able to help me again from the beginning? I really would like to try to fix the problem because I think it's fixable.
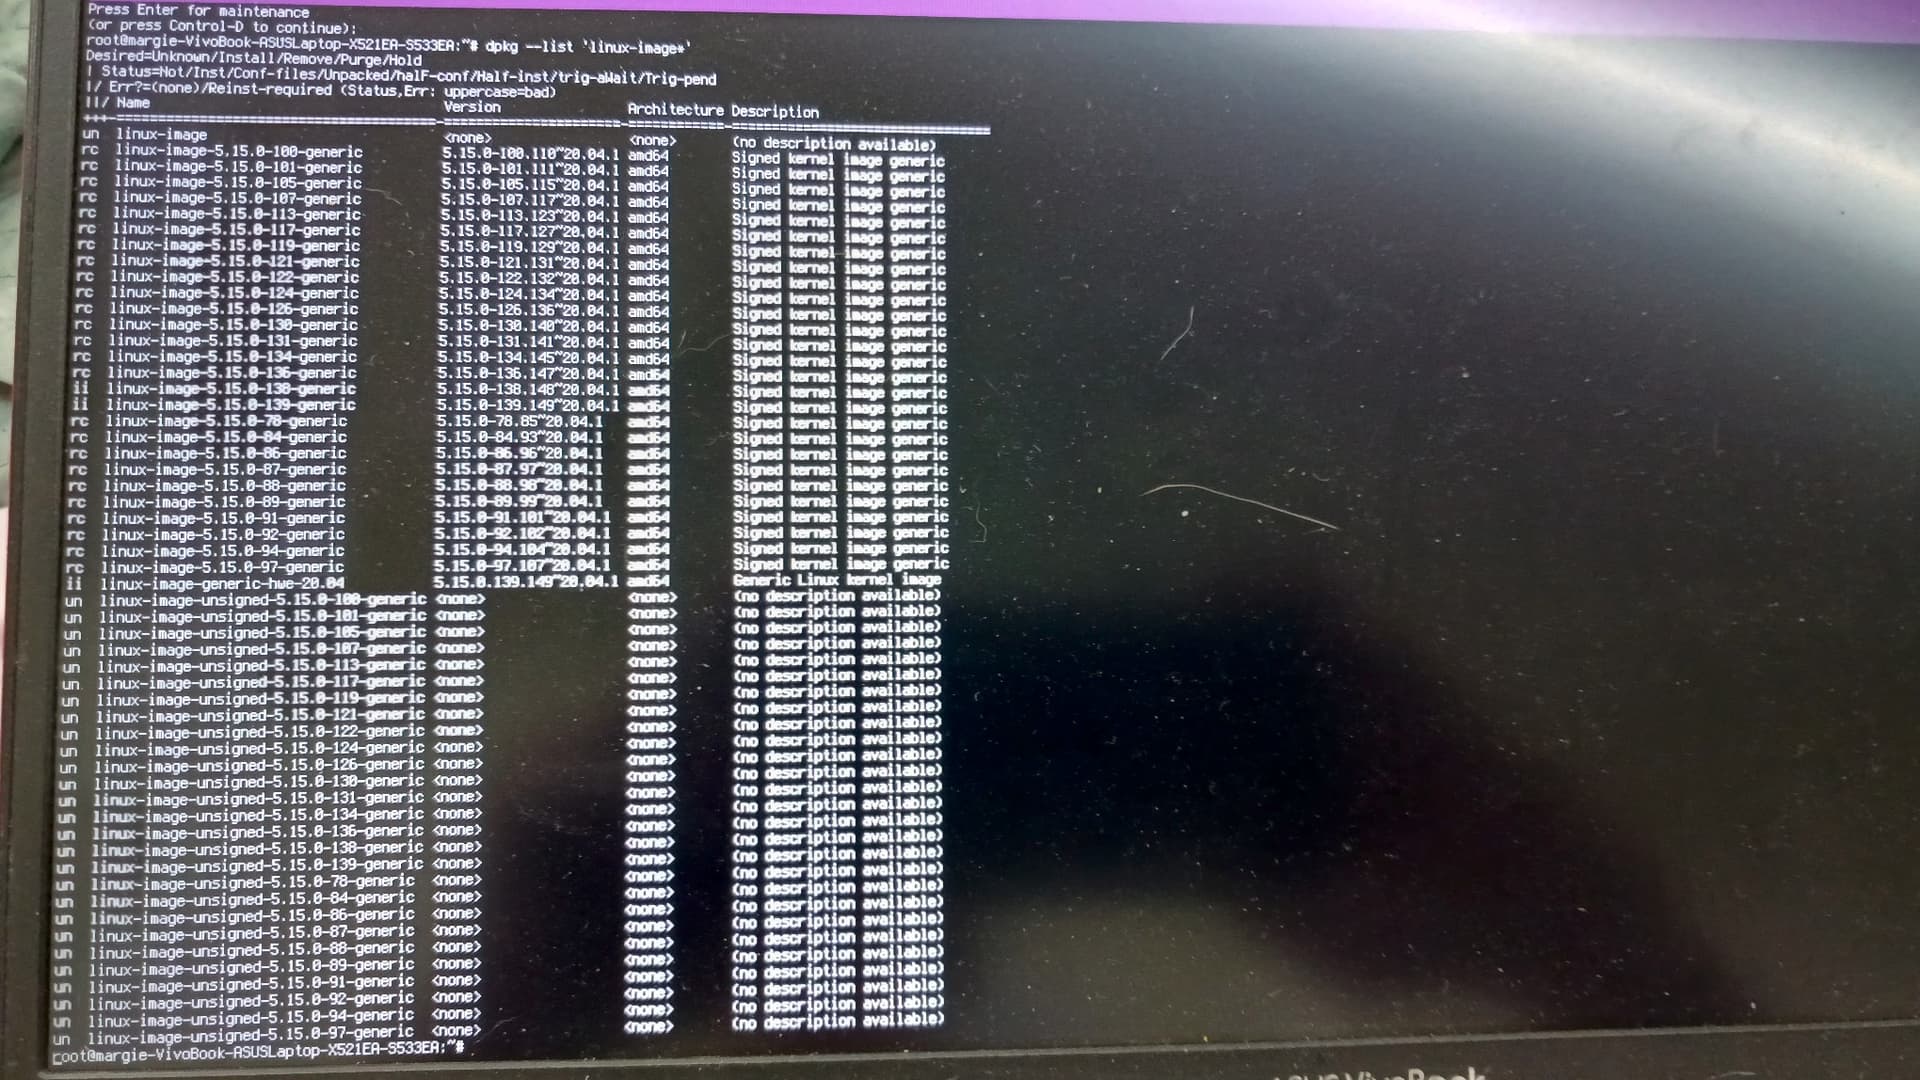
If you can help me, or someone else could, would you be willing to help me again now that I might know more. In the event you or someone else can help, I started from the 1st reply you gave me where you told me to clear out some space. I ran those codes and just now I did the next thing which was to give you the output of dpkg --list 'linux-image*'. I attached the outcome.
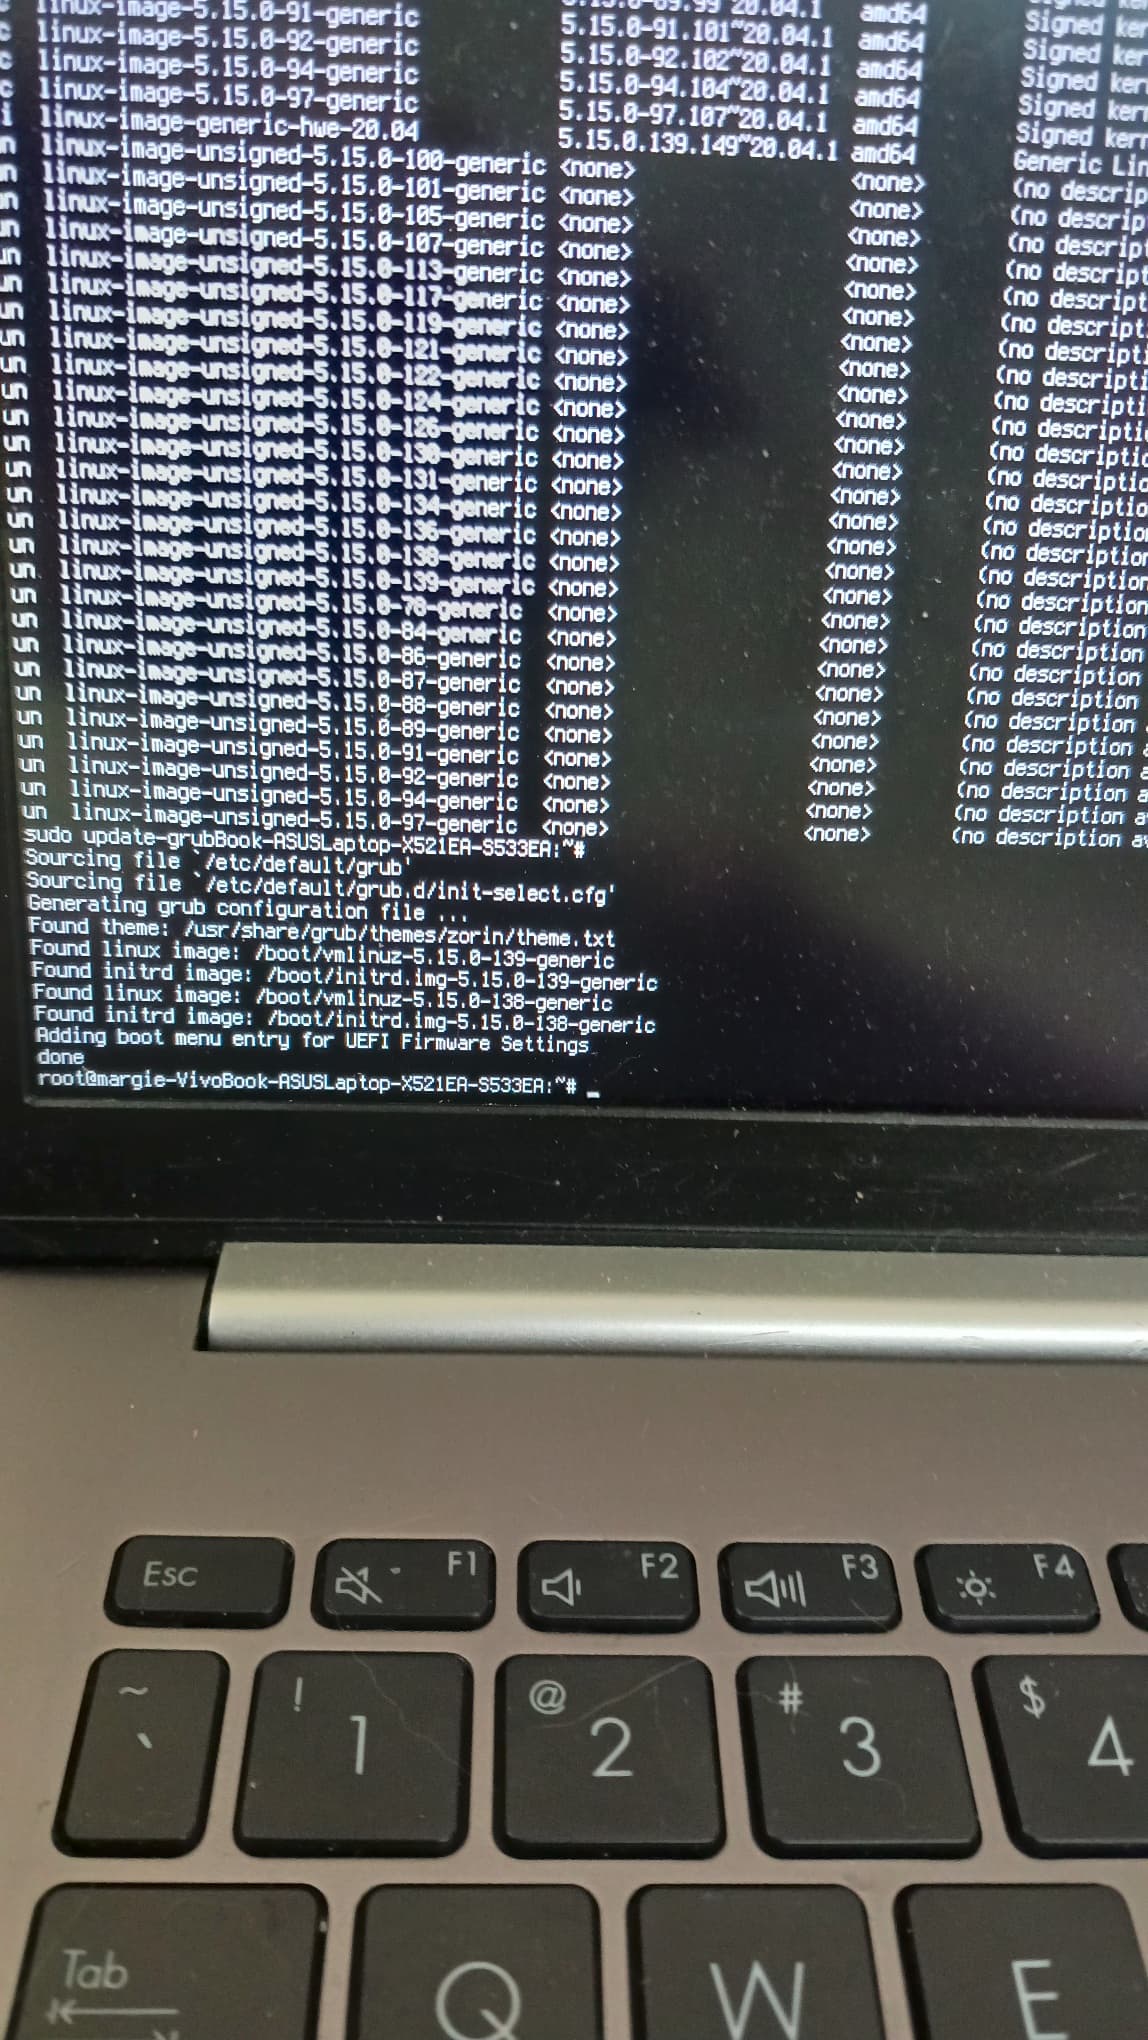
The next thing was to clear out all those "purge linux image-5.15-" images from that long paragraph which I don't think I need to do again. After that you me to run sudo update-grub but I didn't do that. I just did that now and the other attachment shows that outcome. You'll see the outcome is at the bottom of the first attachment.
You then told me to run the dpkg --list 'linux-image*' which I attached already. You said when I got the outcome of this I could employ copy/paste to catch the stragglers. I don't know what to do or what it means.
To begin with then what do you mean by employ copy/paste to catch the stragglers?
When I get this answer I can proceed to the next steps to try them again.
When in the recovery menu, you cannot open this webpage and easily copy a terminal commend, then paste it into your Recovery Menu terminal.
Instead, you must type each command out - and then check for any typos before submitting it (Hitting enter).
I can only recommend at this juncture that you try each cleaning command one at a time.
It is tedious, but safer. It is easier to follow along with any replies the terminal gives you (Watch for errors or warnings).
It is a long list of hefty and bulky kernels taking up space.
You want to delete the unusued old ones but do not delete the newest one since you need a kernel to boot and operate.
So, I would write a list on paper to follow - then boot to recovery, get to the menu, drop to root prompt and carefully follow the list until complete.
With that done, move on to the other cleaning commands to clear journal logs and any other space-hogs.
Just to make sure, I asked you what or how to copy and paste the stragglers, in essence I asked you for the meaning of that.
You say I can do this by typing out each command and hit enter. You are referring to each cleaning command. Are these the cleaning commands you're referring to?
sudo rm -rf /var/crash/, sudo rm -rf /var/tmp/, sudo rm -rf /var/log/, sudo rm -rf /tmp/.
Or are the cleaning commands you're referring to the long paragraph I went through one by one and came up with red EEs?
Then with the list of kernels I'm to delete the unused ones. I should make a list of the unused ones from the list of kernels and then go into recovery and delete them.